Once we have the RAID devices created, we can specify the file systems and mount points of the devices.
Scroll to the line “#1 49.2MB” of “RAID1 device #0”, press ENTER.
Scroll to the “Use as:...” line, press ENTER.
Now we select the file system of the boot partition. “Ext3” is a good option, select it and press ENTER.
When we return to the “Partition settings” screen, select “Mount point” and press ENTER.
Choose /boot as the mount point, press ENTER.
Back in the “Partition settings” screen, select “Done setting up the partition” and press ENTER. You may change the label if you want, but that is not necessary.
Back in the partition/disk map, select the line “#1 509.7MB’ under “RAID5 device #1...”. Press ENTER.
In the “partition settings” screen, select “Use as...” and press ENTER.
This is our swap device, select “swap area” and press ENTER.
Back in the “partition settings” screen, select “Done setting up the partition” and press ENTER. Note that after this, every time you update the partition/device information, the installer will complain that this RAID device does not have a proper partition table. You can safely ignore that message.
In the partition/disk map, select the line “#1 1.5GB” under “RAID5 device #2...”, press ENTER.
Select “Use as...” and press ENTER.
Select “physical volume for LVM” when asked “how to use this partition”. Press ENTER.
Select “Done setting up the partition” back in the “partition settings” screen, press ENTER.
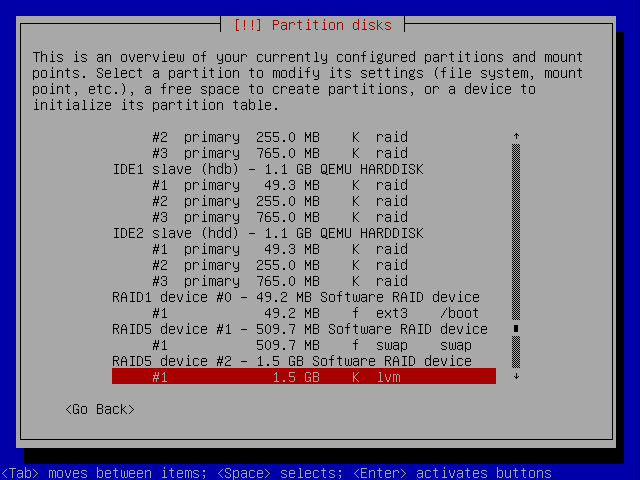
At this point, we have specified how to us all the RAID devices. The partition/drive map should look like the following screen shot: