4.1 Setting up partitions
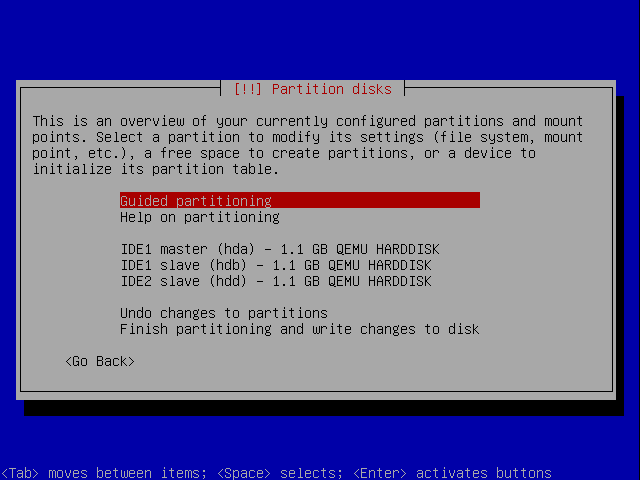
Select the “Manual” option and press ENTER. You should see the following screen describing all the hard disks
detected:
For each drive, do the following:
-
1.
- Use the cursor keys to select the drive, press ENTER.
-
2.
- When asked whether to “create new empty partition table on this device”, answer “Yes”. This bring you back
to the previous screen, but with partition information included for the drive.
-
3.
- Select the “FREE SPACE” of the drive and press ENTER again.
-
4.
- Select “Create a new partition” and press ENTER.
-
5.
- The first partition will be a boot partition. As such, it can be relatively small. 50MB should be more than
sufficient. When asked about the “New partition size”, enter 50MB, then press ENTER.
-
6.
- Specify “Primary” and press ENTER when asked about the type of the new partition.
-
7.
- Specify “Beginning’ and press ENTER when asked about the location of the new partition.
-
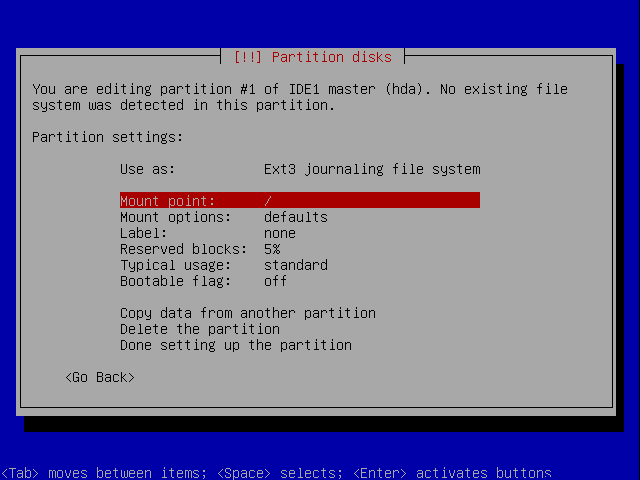
8.
- Then you should see the following screen:
-
9.
- Use up cursor to the “Use as...” line, then press ENTER. We need change the type of the partition.
-
10.
- When asked “How to use this partition”, specify “physical volume for RAID”, then press ENTER.
-
11.
- In the following screen, select “Done setting up the partition” and press ENTER. This should bring you back
to the
-
12.
- This should bring you back to the over all map of drives and partitions. Select the “FREE SPACE” of the
drive being worked on and press ENTER.
-
13.
- Select “Create a new partition” and press ENTER.
-
14.
- The second partition is intended as a swap partition. Because this partition will be a part of a RAID5 device,
it only needs to be one half of the needed capacity. The general rule is to use about 100% or 200% of the
amount of physical RAM for the entire swap partition. In our example, it is sufficient to specify 256MB for
this partition as the VM only has 512MB of RAM. Press ENTER after specifying the size.
-
15.
- Select “Primary” as the type of the partition, press ENTER.
-
16.
- Select “Beginning” as the location of the new partition, press ENTER.
-
17.
- Select the “Use as: ...” line, then press ENTER.
-
18.
- Select “physical volume for RAID”, press ENTER.
-
19.
- Select “Done setting up the partition”, press ENTER. This brings us back to the drive/partition map screen.
-
20.
- Select “FREE SPACE” of the drive being worked on, press ENTER.
-
21.
- Select “create a new partition”, press ENTER.
-
22.
- This partition is for the main part of the file system. As a result, it is safe to specify the maximum size. Press
ENTER.
-
23.
- Select “Primary” as the partition type, press ENTER.
-
24.
- In the partition settings screen, move the cursor up to “Use as...” and press ENTER.
-
25.
- Select “physical volume for RAID”, press ENTER.
-
26.
- Select “Done setting up the partition”, press ENTER.
-
27.
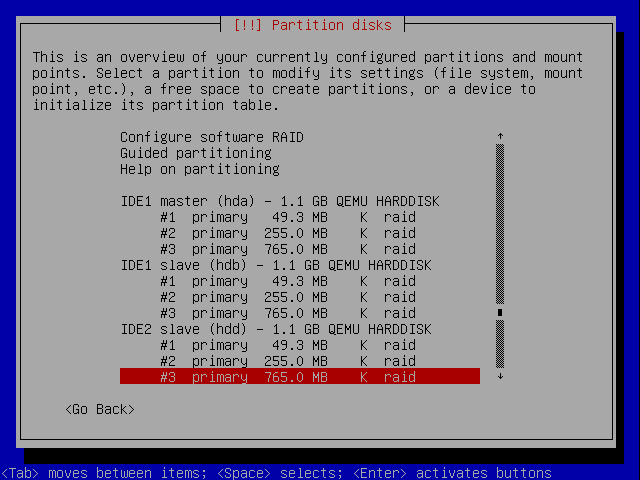
- This ends the configuration of one drive.
After all the drives are configured, you should see the drive/partition map screen as follows: