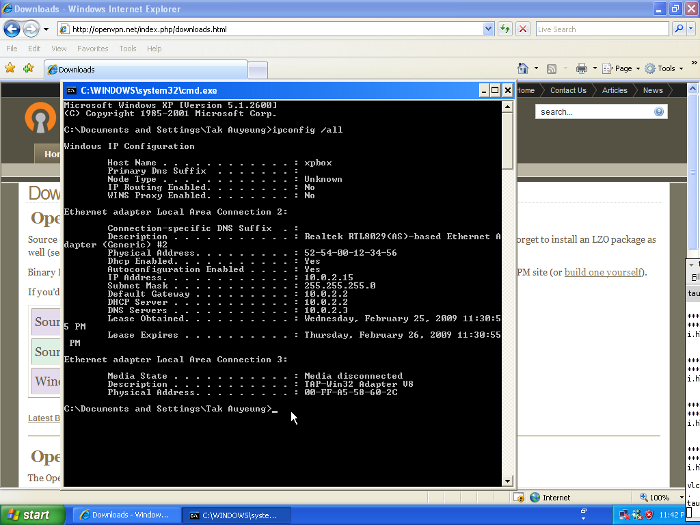
As soon as the installer is done, a TUN/TAP interface is created. We’ll need to create two more. We need to first examine the real NIC properties. It is best to use the command line interface. Click “Start”, then “Run...”, then specify cmd.
In the command line interface, type the following command (followed by the ENTER key):
This lists all the interfaces. Pay attention to the physical NIC.
In this example, the physical connection is “Local Area Connection 2”. You may want to write down the settings somewhere because it will be useful. Particularly, the “IP Address”, “Subnet Mask”, “Default Gateway” and “DNS Servers” will be important.
Now is a good time to structure DHCP. There will be two DHCP servers for the same subnet. You physical LAN DHCP (which is usually the residential gateway) will continue to assign IP addresses to real computers on the network. However, you need to limit the range of IP addresses so that some will be reserved for VPN. Consult your residential gateway manual to learn how to set the range of IP addresses that can be assigned by the DHCP server.
Next, the OpenVPN server is also a DHCP server assigning IP addresses to incoming VPN connections. As such, it also needs to define a range of assignable IP addresses. This range should not overlap with the range of the LAN DHCP server.
Last, but not least, you need to come up with a valid IP address that is not a part of either DHCP IP address ranges. This IP address will be the static IP address of the bridged interface.
For example, if you configure the LAN DCHP server to assign a range of 192.168.0.32 to 192.168.0.63, you have a lot of room to play with. You can, then, choose a range of 192.168.0.128 to 192.168.0.254 for the VPN DHCP server. Assuming 192.168.0.1 is the gateway and 192.168.0.2 is the DNS server, you still have plenty of addresses to use. Just remember that 192.168.0.0 is the network address, and 192.168.0.255 is the broadcast address. These two addresses cannot be assigned to an interface.
In this example, 192.168.0.100 is not in either DHCP assignable range, and it is not used by any existing network devices. This means that 192.168.0.100 is one of the many choices that you can use for the bridged interface.