Paper stars are an easy craft to do while you're bored or want to do something with your hands. Once you get a hang of it, your room will be flooded with tiny paper stars.
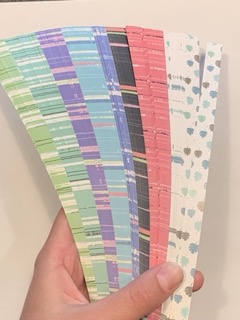
In the video, I will be using star paper to make my paper stars because it is a thick and pre cut paper made for making paper stars. However, if you have any kind of paper and scisors you can easily make stars without star paper. If using college ruled paper, cut along the lines to make paper strips. Also cut off any holes and rough edges. Star paper is about 1 cenimeter wide and 9.5 inches long. If you want colorful stars you can use pens, crayons, or pencils and color on one side of the paper strip.
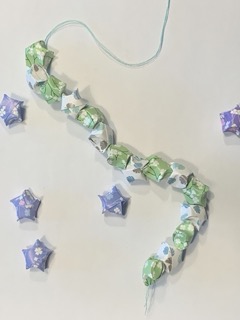
When you are done making your paper stars you can store them in a glass container for decoration, string them together to hang on your wall, make jewlery with them, or use them in other crafts.
The song playing during the video is "Flowers" by Anno Domini. Listen to the song here.
Let's make your first paper star!
Follow the steps below and watch the video for a visual demonstration. You can slow down the video by clicking the three dots to the right of the video and adjusting the playback speed.
Steps:
1:
Hold your strip of paper horizontally with the blank side, or the side you don't want to show, facing up.
2:
Now we are going to tie a knot with the paper. Take one end of the paper and fold it over in a loop to the other end. This should make a ribbon or half figure eight shape.
3:
To tie the knot you can put the long end of the paper through the loop. But don't pull tightly just yet!
4:
Now that you have your loose knot, begin to tighten it by pulling on the long and short sides of the paper until the knot is a pentagon shape. Then press the pentagon flat.
5:
You should have a short blank/white end of the strip sticking out from the pentagon. Fold it inwards over the pentagon. If the short end is now sticking over the other side of the pentagon, fold it again, and if you can, tuck the end in one of the folds. Press the shape down one more time.
6:
Now take the long end of the strip and fold it towards and over the pentagon. The paper should naturally fall on one of the 5 sides of the pentagon. Don't fold it over any of the points, just the sides. Wrap it around to the other side without pusing the shape flat, just pull snug on the end of the strip.
7:
Reapeat folding the end over the pentagon. Don't fold it over the same side in a row.
8:
Once your end is too short to fold over again, tuck it into one of the folds.
9:
Now hold the pentagon with your pointer fingers and your thumbs.
10:
With one thumb push firmly on one of the sides of the pentagon.
11:
Rotate to the next side and repeat.
12:
If your folds were tight and depending on your paper, your star should be puffy looking. It takes practice to get a really nice looking star and sometimes one side looks better than the other.